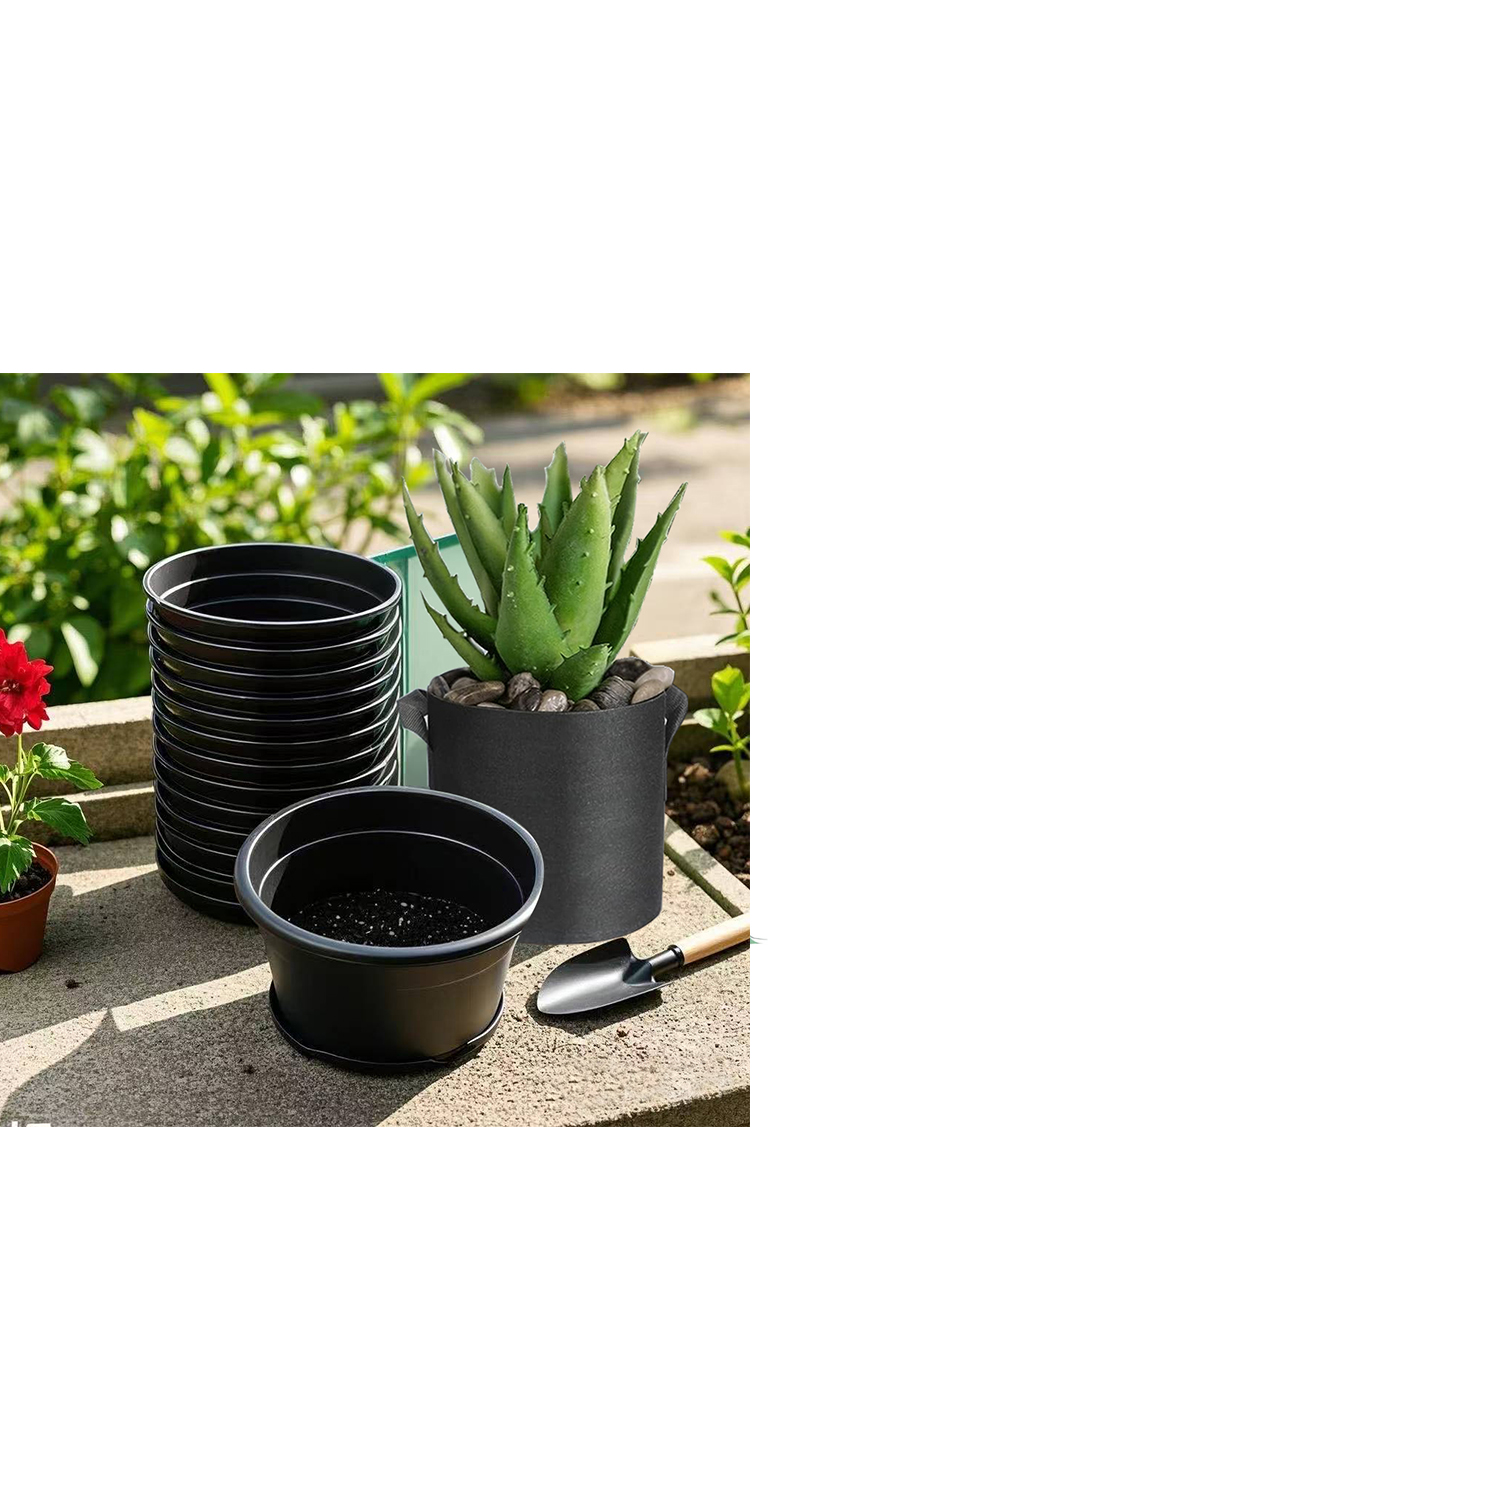
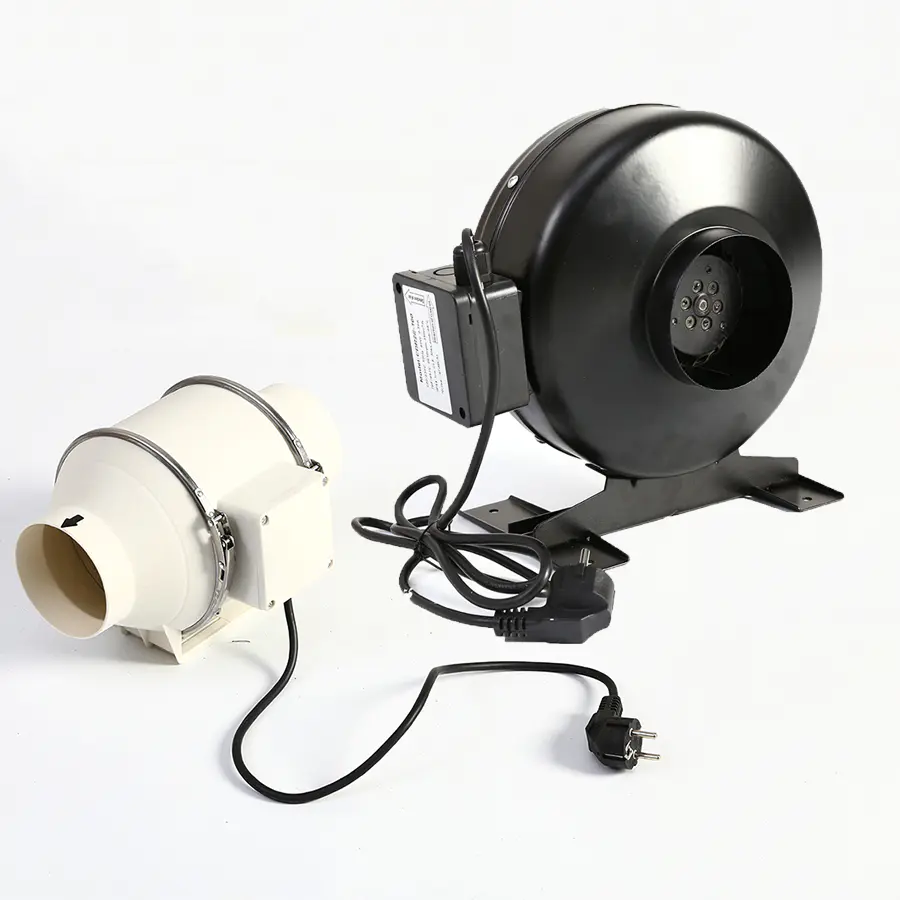
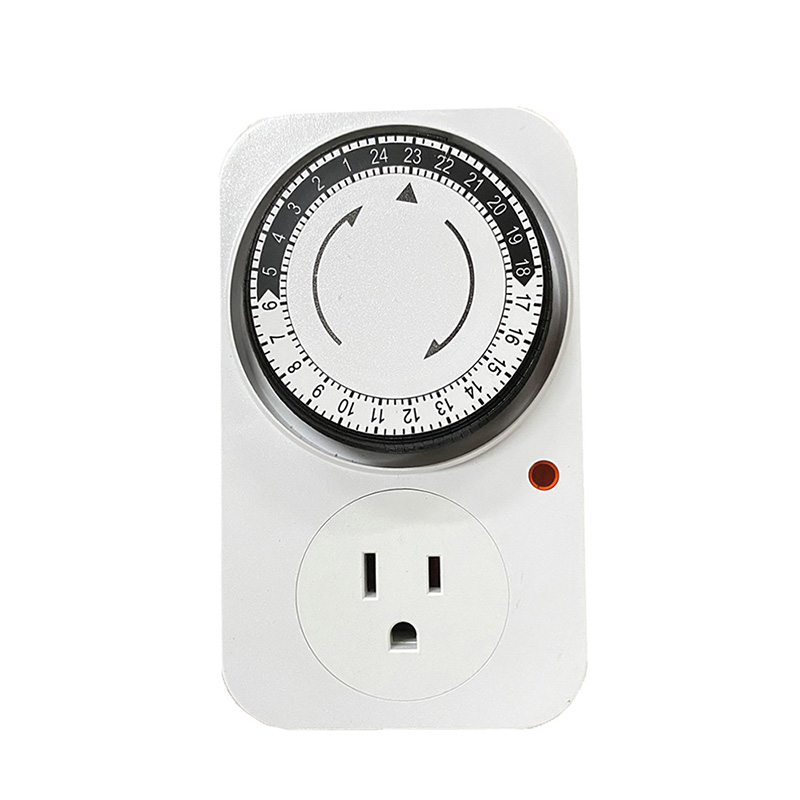
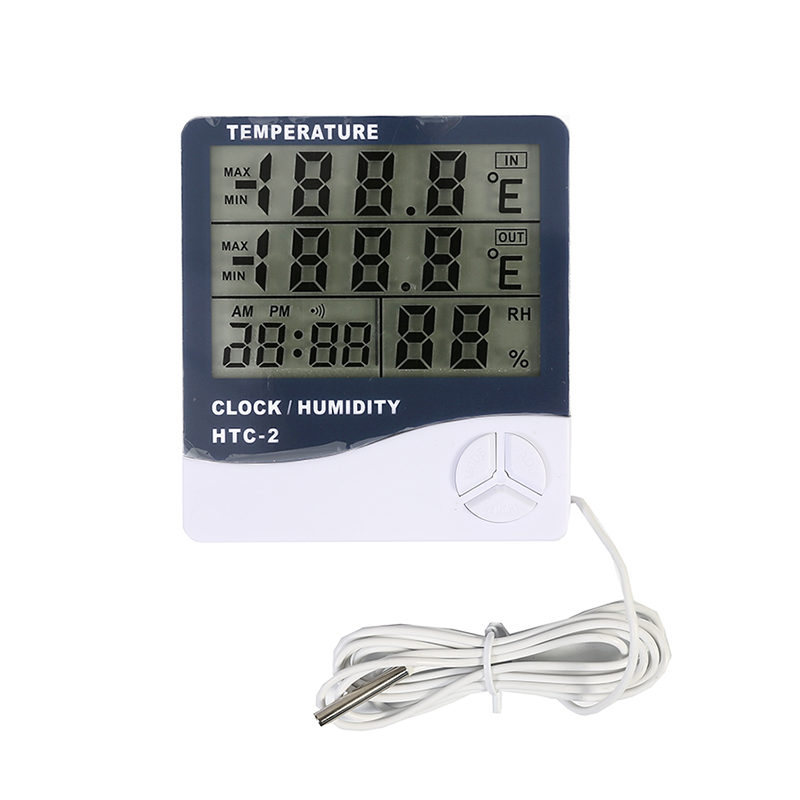
OEM/ODM Grow Tent Kit Accessories

Home / Products / Grow Tent & Kit / Grow Tent Kit Accessories

Grow Tent Kit Accessories Manufacturers

Taizhou Sunshine Garden Products Co.,Ltd is a leading home garden and hydroponic grow equipments manufacturer and supplier from China with 12 years OEM & ODM experience. Specialized Grow Tent Kit Accessories Manufacturers, Our main products can be divided into two series, including Hydroponic Grow Equipmentslike Full completed grow tents and kits, Grow tables and trays, Grow bags, Seeding propagation, another series is Home Garden Products like Mini Greenhouses, Hanging planters, Garden waste bags and so on. We wholesale Grow Tent Kit Accessories, We could also make customized products according to your needs. We helped a lot of clients creating their own brand with our strict quality raw material select, higher quality production technology and professional services. Warmly welcome to visit our Grow Tent Kit Accessories factory.

Our Service

Our factories are supervised carefully, we have strict quality assurance test and lab test and multiple inspections. This means we find glitches before they become problems, thus preventing you from disastrous quality problems. We guarantee your satisfaction from start to finish.

We helped a lot of clients creating their own brand with our strict quality raw material select, higher quality production technology and professional services.

We could also make customized products according to your needs. you can talk to our customer service center about your sourcing requirements, whether selecting a current product from our catalog or seeking assistance for your application.

News
How Are Sodium Grow Lights Supporting Modern Indoor Farming
Sep 11.2026
Indoor farming changes the relationship between crops and their growing environment in ways a traditional field operation never had to consider. Plants are no longer dependent on an open field or natural daylight alone, sitting exposed to whatever the sky delivers that day. Growers can arrange planting areas inside buildings, greenhouses, and other controlled spaces where artificial lighting becomes part of the daily production routine, almost like another utility running alongside water and power. A Sodium Grow Light can serve as one option within this type of environment, chosen for a specific reason rather than habit. Its role isn't simply making a room brighter for its own sake. The lighting system needs to fit the crop layout, growing method, working space, and overall farm operation running around it every day. Natural light can vary according to weather, building design, season, and location, sometimes shifting week to week in ways a grower can't control. Indoor growers therefore need to think carefully about how plants receive light when natural conditions aren't enough for the intended growing plan already mapped out on paper. This becomes particularly relevant to year-round production that doesn't pause for winter. When growing activities continue inside a controlled space, lighting becomes part of a more predictable daily routine a grower can actually schedule around. The grower can plan the growing area around the available equipment, instead of relying entirely on outdoor conditions that shift without warning. Greenhouse cultivation presents a slightly different situation worth separating out. Natural light can remain part of the growing environment, while artificial lighting may get used to support the overall lighting plan layered on top of it. This creates a mixed environment where fixture placement and daily operation require careful thought before installation day arrives. Vertical farming brings another challenge entirely, stacking growing space rather than spreading it out. Plants can be arranged on multiple levels, so lighting has to work within a compact structure that leaves little room for error. A fixture that suits an open greenhouse may not fit naturally into a multi-level growing system squeezed into a warehouse. These differences show why artificial lighting should be considered as part of the farm design from the earliest planning stage. The light source, fixture structure, growing layout, and working environment all need to make sense together as one coherent system. How Do Sodium Grow Lights Fit Into Vertical Farming? Vertical farming uses available indoor space in a different way from traditional crop production spread across acres. Instead of spreading plants across one broad growing area, crops may be arranged across several levels stacked one above another. This can make lighting placement a lot more important than it would be in an open field. Grow Lights Sodium can be considered for indoor growing areas where artificial light forms part of the crop environment day in and day out. The fixture needs to be positioned so that it works with the structure supporting the plants, rather than fighting against the racks and shelving already in place. Space planning becomes a daily concern in vertical farms in ways that surprise people new to the setup. Workers may need to reach different growing levels, inspect plants, move supplies, clean surfaces, and maintain equipment throughout a normal shift. Lighting fixtures should not make these activities unnecessarily difficult for someone climbing between levels with a watering can. The physical shape of a fixture can therefore matter quite a bit in this context. A product with a suitable mounting arrangement can be a lot easier to integrate into a particular growing structure already built out. Cable placement and access should also be considered during installation, since a stray cord in a walkway becomes a hazard fast. Vertical farming also creates a need for organized lighting zones spread across the facility. Different growing areas may contain different crops or be managed according to different production routines running on separate schedules. A flexible layout can help growers organize these areas more clearly instead of treating the whole facility as one uniform block. Vertical Farming Concern Lighting Design Consideration Multiple growing levels Fixture placement should suit each level Limited working space Equipment should leave room for daily tasks Plant arrangement Light should be planned around the crop layout Maintenance access Workers need practical access to fixtures Changing crop zones Lighting should fit possible layout changes Equipment organization Fixtures should work with the wider farm structure The goal isn't making every vertical farm use the same lighting arrangement copied from a competitor. Each operation has its own physical structure and production needs built up over time. A suitable Sodium Grow Light should be considered according to the actual space in front of a grower, rather than a general description of indoor farming pulled from a brochure. What Role Can Sodium Grow Lights Play in Greenhouse Cultivation? Greenhouses create a bridge between outdoor and indoor growing that a fully enclosed warehouse doesn't have to manage. Natural daylight enters the structure through the glass or plastic roofing, but growers may still use artificial lighting as part of their production plan to fill in the gaps. This creates a different role for High Sodium Grow Lights compared to a windowless facility. The fixture doesn't necessarily need to replace natural light entirely. Instead, it can become part of an artificial lighting environment designed around the conditions already present inside the greenhouse. The structure of the greenhouse can influence fixture placement quite a bit in practice. Roof design, plant rows, working paths, support structures, and ventilation equipment may all occupy the same space a lighting fixture needs to share. Growers also need to consider the relationship between lighting equipment and the plants as they mature over a season. As crops grow, their height and arrangement can change substantially from seedling to harvest. A lighting system that fits the initial layout should still make sense as the growing area develops week over week. Maintenance is another practical issue worth planning for early. Greenhouse environments involve regular cleaning, plant care, irrigation, and movement throughout the day. Lighting fixtures need to be accessible enough for routine inspection and care without requiring a ladder every time. The surrounding environment can also affect product selection in ways easy to overlook. Moisture, humidity, dust, and plant material are all part of agricultural work that a fixture has to tolerate. Buyers should review the manufacturer's instructions to make sure the selected fixture is suitable for the intended location rather than assuming one product fits every greenhouse. A HPS Grow Light Fixture can therefore be evaluated as part of the complete greenhouse environment surrounding it. The fixture's physical structure, installation method, access, and relationship with other equipment all matter together, not in isolation. This approach gives growers a much clearer way to think about artificial lighting before signing an order. The question becomes less about choosing a particular light category off a list. It becomes more about deciding how that category fits the actual growing space it will live in. How Can Artificial Lighting Support Year-Round Production? Year-round production requires growers to manage the growing environment across changing outdoor conditions that don't pause for a harvest cycle. Indoor systems can provide more control over when and where crops get cultivated, but they also create a need for carefully planned artificial environments that keep everything on schedule. Lighting is one part of that planning process worth mapping out early. When daylight changes with the seasons, growers may need artificial lighting to maintain the intended routine within the growing area regardless of what's happening outside. A Sodium Grow Light can become part of this setup where its characteristics suit the crop and facility in question. The fixture can be included in the farm's daily lighting schedule and integrated with the physical layout of the growing area already in place. The idea of year-round production is also connected with space management in ways that ripple through the whole operation. A growing facility may need to support different crops at different stages within the same building. This can require lighting arrangements that are easy to organize as production activities change from one batch to the next. Indoor farms may also operate in buildings that were not originally designed for agriculture at all, like a converted warehouse or old retail space. Ceiling height, available electrical arrangements, access paths, and equipment locations can affect how lighting gets installed in a space never meant for crops. This makes planning important before purchasing anything. Growers can review the entire growing space and identify where fixtures can be placed without interfering with other activities already underway. A practical lighting plan may consider several points worth walking through together: The location of the crop area. The arrangement of planting structures. Worker access and movement. Fixture installation points. Cleaning and maintenance access. Interaction with other farm equipment. Possible changes to the growing layout. These points can help connect artificial lighting with actual farm operations happening on the ground. They also make it a lot easier to discuss requirements with lighting suppliers before placing an order. Why Does Fixture Design Matter as Much as the Light Source? A grow light is not just a lamp screwed into a socket somewhere overhead. The fixture surrounding it affects how the product gets installed, maintained, and integrated into the growing environment it's meant to serve. A HPS Grow Light Fixture can include several physical elements that influence its use day to day. The housing, mounting structure, cable arrangement, access points, and overall shape can all affect how the product fits inside a farm already built around other equipment. This becomes particularly important in crowded growing spaces where every inch matters. Workers need room to move between crops and equipment without ducking under low-hanging fixtures constantly. A fixture that occupies unnecessary space may make the growing area a lot harder to manage than it needs to be. Heat is another practical consideration worth taking seriously. Artificial lighting equipment can affect the environment around it in ways a grower needs to plan for, not just the plants underneath. Growers need to follow product instructions and consider how the fixture fits into the overall growing space it's placed within. Maintenance access should also be considered during installation, not tacked on afterward as an afterthought. Workers may need to clean equipment or inspect fixtures as part of normal farm routines that repeat weekly. A design that allows practical access can make these tasks a lot easier to organize into a regular schedule. Fixture placement can also affect the visual layout of a growing facility in ways that matter for workflow. In vertical farms, fixtures may need to fit between different planting levels stacked tightly. In greenhouses, they may need to work around support structures and access paths already crisscrossing the space. This is why Grow Lights Sodium should be evaluated as a complete product category, rather than by the light source alone sitting inside the housing. The fixture needs to make sense within the physical and operational environment surrounding it. How Should Different Crops Influence Lighting Choices? Indoor farms may grow many types of plants under the same roof, from compact herbs to sprawling vine crops. Their size, structure, growing cycle, and arrangement can vary considerably from one row to the next. These differences can affect how artificial lighting gets planned across the facility. Leafy crops may occupy a relatively compact growing area that stays low and dense. Other plants can become taller or spread across a larger space as they mature toward harvest. The lighting system should be considered alongside these physical differences, not applied uniformly regardless of what's growing underneath. Plant spacing is another factor worth accounting for early. Closely arranged crops create a different lighting environment from plants placed farther apart with room to spread. The fixture layout needs to reflect the way the growing area is actually organized on the ground. A Sodium Grow Light should therefore be selected according to the intended crop application rather than a generic assumption. Growers should avoid assuming that one lighting arrangement will suit every plant or growing method they might run through the same facility. Crop rotation can also influence the decision in facilities that switch things up regularly. If a facility regularly changes what it grows from season to season, the lighting system may need enough flexibility to work with different layouts without a full rebuild each time. The growing stage matters as well, sometimes more than the crop type itself. Young plants and mature plants can occupy different spaces and have different physical forms as they develop. Lighting placement may need to account for these changes as a batch moves from seedling tray to full-grown plant. This doesn't mean that every crop requires a completely separate lighting system built from scratch. It means that buyers should explain the intended application when discussing products with suppliers, rather than leaving it vague. Clear communication can make product selection a lot more practical in the end. Instead of asking which light is suitable for indoor farming in general, a grower can describe the crop, growing structure, room layout, and intended production process in specific terms. What Should Buyers Consider When Choosing High Sodium Grow Lights? Purchasing decisions should begin with the actual growing environment a fixture will live in, not a spec sheet reviewed in isolation. A product that appears suitable in a catalog may not fit the physical structure or daily workflow of a particular farm once it actually arrives on site. For High Sodium Grow Lights, buyers can examine several areas before making a decision that's hard to reverse later. These include fixture structure, mounting method, maintenance access, installation requirements, operating instructions, and suitability for the intended growing location it will occupy. The product should also be considered in relation to the farm's crop arrangement already mapped out. A lighting system for a vertical growing structure may need a genuinely different physical arrangement from one used across an open greenhouse with more headroom. Buyers should also pay attention to responsible product descriptions when reviewing supplier claims. Lighting manufacturers and distributors should avoid claims that guarantee crop results or suggest that a particular fixture will produce a specific harvest outcome in every situation, since growing conditions vary too much for that. A clear product description can instead explain what the fixture is designed for and where it can be used realistically. This gives buyers useful information without turning ordinary product features into unsupported promises that fall apart in practice. Buyer Area Practical Question Growing method Is the product intended for indoor, vertical, or greenhouse use? Crop arrangement How are the plants positioned? Installation Where can the fixtures be mounted? Maintenance Can workers access the equipment conveniently? Environment Is the fixture suitable for the intended growing conditions? Workflow Will the equipment interfere with daily farm activities? Product guidance Are installation and care instructions clear? Future changes Can the lighting arrangement adapt to a changing crop layout? Wholesale buyers may also need to consider product variety when placing a bulk order for multiple clients. Different customers may operate different growing systems under one roof or across several sites, so a lighting supplier may need several fixture designs for different applications rather than a single catalog entry. This application-based approach can help make product sourcing more organized on both sides of the transaction. It gives manufacturers clearer information and helps buyers compare products according to real working conditions instead of marketing copy. How Is Grow Light Design Developing With Modern Farming Needs? Modern farming spaces are becoming more varied than a single greenhouse model could ever cover. Greenhouses, indoor farms, vertical systems, and mixed growing environments each create genuinely different requirements for artificial lighting depending on the layout. This is encouraging lighting manufacturers to look beyond the light source itself as the only variable worth optimizing. Fixture shape, installation, maintenance, and compatibility with growing structures are becoming important parts of product development that show up in design meetings now. For HPS Grow Light Fixture development, this can mean greater attention to how the fixture fits different working environments a customer might actually operate in. A product used in a greenhouse may have different physical priorities from one installed within a multi-level indoor farm stacked three or four rows high. The same principle applies to High Sodium Grow Lights sold across different market segments. Product design needs to consider the people who install, operate, clean, and maintain the equipment day after day, not just the plants receiving the light. Indoor farming also encourages more organized use of growing space across an entire facility. As growers make better use of vertical areas and controlled environments squeezed into existing buildings, lighting equipment needs to fit naturally into these layouts rather than forcing a redesign around it. This creates opportunities for product manufacturers to develop different fixture structures for different applications rather than a one-size-fits-all catalog. Instead of treating indoor farming as one broad market lumped together, suppliers can consider vertical growing, greenhouse cultivation, crop rooms, and other growing environments separately, each with its own product line. Growers can benefit from the same application-focused approach when shopping for equipment. A lighting decision becomes a lot easier to evaluate when the crop, facility, layout, and daily workflow are clearly defined from the start. As artificial lighting becomes a regular part of controlled farming environments spreading across the industry, the conversation is moving beyond the question of whether crops need additional light at all. More attention is being placed on how lighting equipment fits the space, how workers interact with it during a normal shift, and how the fixture supports an organized growing routine that holds up over a full production cycle.
What Design Trends Are Shaping HPS Grow Light Fixture Development
Sep 04.2026
HPS grow lighting has a long history in controlled growing environments, but fixture design keeps changing as growers and equipment buyers look for more practical products to install. The focus is no longer only on producing light and calling it done. The structure around the light source also affects installation, maintenance, heat management, and daily operation on the floor. A modern growing facility may have different spaces for different crops and growing stages under one roof. Some areas may need overhead fixtures, while others may require a more focused arrangement suited to a smaller zone. This creates demand for products that can fit different layouts without making installation unnecessarily complicated for the crew. The same change can be seen in commercial purchasing decisions. Buyers often look beyond the light source itself and examine the complete fixture from top to bottom. Housing design, mounting options, cleaning access, heat control, and replacement convenience can all influence product selection at the purchasing stage. Sodium Grow Light products are therefore getting developed with more attention to the relationship between the lamp and its surrounding structure. The fixture has become a genuinely important part of how the lighting system fits into a growing space day after day. Grow Lights Sodium products also need to work within environments where moisture, dust, heat, and regular maintenance can affect daily use. A fixture designed with these conditions in mind can make the overall installation a lot easier to manage over time. This shift has encouraged manufacturers to rethink familiar fixture designs sitting in their catalogs. Instead of treating the housing as a simple protective shell, product development increasingly considers how the entire unit will get installed, cleaned, serviced, and used once it's hanging over live plants. How Are HPS Fixture Structures Changing? The physical structure of an HPS fixture is receiving more attention, since the housing influences both the appearance and practical use of the product on a daily basis. Growers often work in spaces where equipment gets installed above plants, so fixture weight, shape, mounting position, and access can affect daily work throughout the season. A compact structure can help when space is limited, while a broader housing may provide a different way to distribute light across the growing area beneath it. The right shape depends on the layout of the facility and the position of the crops sitting under the fixture. Reflective surfaces are also part of the fixture structure worth paying attention to. Their role is directing available light toward the growing area, instead of allowing it to spread unnecessarily into surrounding spaces that don't need it. Housing materials can influence cleaning and long-term appearance as well over years of use. Growing facilities can contain moisture, plant material, dust, and other residue, so surfaces should get considered with regular maintenance in mind from the start. Modern designs also tend to pay more attention to component arrangement inside the housing. Internal parts need to get positioned in a way that supports service work and helps reduce unnecessary difficulty when inspection is required down the line. The overall structure can get viewed through several design questions worth walking through. Design Area Practical Consideration Housing Does the shape suit the growing environment? Reflective section Does the structure direct light toward the crop area? Mounting Can the fixture fit the intended installation method? Surface Is routine cleaning manageable? Internal layout Can components be accessed when service is needed? Cable arrangement Can wiring remain organized during installation? These details may seem small when viewed separately on a spec sheet. Together, they can shape how easily a lighting product fits into a commercial growing operation running day to day. Why Does Heat Dissipation Matter in Fixture Development? Heat is an unavoidable consideration in high-intensity growing lights hanging above plants for hours at a stretch. The fixture must therefore manage heat in a way that fits the surrounding growing environment around it. Traditional designs often use the fixture body itself as part of the heat management process. Newer product development continues to explore housing shapes and ventilation arrangements that can help move heat away from sensitive components tucked inside. High Sodium Grow Lights may get installed above crops for long operating periods stretching across a growing cycle, so heat management needs consideration alongside mounting height, airflow, and the layout of nearby equipment in the same room. The goal isn't simply making a fixture feel cooler on the outside to the touch. The internal arrangement also matters, since excessive heat around electrical components can affect maintenance needs and product service life over time. Ventilation openings can support air movement, but their design also needs to consider dust and moisture floating around the facility. A growing facility isn't always a clean indoor room like a lab. Plant debris and airborne material may enter equipment if the housing is poorly suited to the environment it's placed in. Some fixture designs use larger external surfaces to help release heat into the surrounding air. Others use fins, vents, or shaped housings instead. The specific approach can vary according to the product structure and application it's built for. Heat management is also connected with installation choices made on-site. A fixture installed too close to other equipment may have less room for air movement around it. Buyers should therefore consider the fixture together with the physical environment, rather than examining the product in isolation from its surroundings. This has made thermal design a genuinely important part of product development across the industry. Manufacturers are increasingly expected to think about how the fixture behaves after it leaves the factory and enters a real growing facility with real conditions. What Installation Methods Are Becoming More Practical? Installation is a major concern for commercial growers, since lighting systems can cover large areas across a single facility. A fixture that's difficult to mount may increase labor demands and make future adjustments a lot less convenient for the crew. Suspended installation remains a common approach, since it allows fixtures to get positioned above the growing area without taking up floor space. That said, the mounting structure needs to match the ceiling, support system, and overall facility layout it's going into. Some projects may require fixtures to get moved or adjusted during changes to the growing arrangement mid-season. Flexible mounting options can make this a lot easier when the facility needs to accommodate different crops or production areas over time. The connection between the fixture and its support system also matters quite a bit here. Installers need clear access to mounting points and wiring while working overhead. A simple physical structure can make the installation process a lot easier to understand for the crew doing the work. Maintenance access should get considered at the same stage, not added on afterward. If a fixture needs to get opened or removed later, the mounting method shouldn't create unnecessary obstacles in the way. For large commercial facilities, installation planning can get organized around several practical points worth checking off. Mounting location: The fixture should fit the planned position above the growing area. Support structure: The building needs to provide a suitable way to hold the equipment. Cable routing: Wiring should remain organized and accessible. Maintenance access: Service workers need enough room to inspect the fixture. Future adjustment: The installation should allow reasonable changes when the growing layout changes. These considerations can influence the fixture design itself before it ever ships. A product may look simple sitting in a box, but its mounting system can determine how practical it becomes during real installation work on-site. How Are Application Requirements Influencing HPS Fixture Development? Different growing environments have genuinely different needs from one facility to the next. A small indoor growing room may have a simple layout, while a commercial greenhouse or larger cultivation facility can contain multiple growing zones under one roof. The lighting fixture must therefore fit the space, rather than forcing every application into the same design regardless of layout. This has encouraged more attention to fixture shape, mounting flexibility, housing protection, and maintenance access across the product line. Greenhouses introduce their own conditions worth planning around. Moisture and changing air conditions can affect equipment placement and cleaning routines throughout the season. The fixture design needs consideration alongside the physical environment it's placed in. Indoor cultivation areas may have tighter ceiling arrangements to work around. Equipment can get installed close to ventilation systems, structural supports, and other facility components crowding the same space. Vertical growing spaces create another challenge, since lighting can get arranged at different levels stacked on top of each other. A large overhead fixture may not suit every configuration in a vertical setup. HPS lighting can also appear in supplemental lighting applications alongside other light sources. In these cases, the fixture may need to work alongside natural light or other forms of artificial lighting already in place. This variety is pushing manufacturers toward more application-focused product development across their catalogs. Instead of creating a single general-purpose housing, product families may offer different structures for different installation environments buyers are working with. The trend proves useful for buyers, since the decision can start with the growing space, rather than the product catalog sitting on a shelf. Understanding the application helps narrow down which fixture structure is genuinely appropriate for the job at hand. Can Reflector and Housing Design Change How Light Is Used? The reflector is a genuinely important part of many HPS fixtures, since it helps guide light toward the growing area below. Its shape and position can affect the overall distribution created by the fixture across the room. A well-matched reflector can help reduce unwanted light spread outside the target area. This matters in commercial facilities where growing zones get arranged in a planned pattern across the floor. Housing design and reflector design also need to work together as one unit. A reflector that's suitable in isolation may not perform in the same way once combined with a different housing shape around it. The position of the lamp within the fixture is another design consideration worth thinking through. Manufacturers need to consider how the light source, reflector, housing, and mounting position interact with each other. Different crops and growing layouts can create different preferences depending on the setup. A broad growing area may call for a wider distribution across the space, while a more focused space may need a different arrangement instead. This is why fixture development is moving away from viewing the reflector as a separate component bolted on. It's becoming part of the overall luminaire design from the start. The visual appearance of the fixture can also get affected by these choices. Reflective surfaces, protective covers, and housing shapes contribute to how the equipment looks inside a commercial growing facility day to day. For facility designers, this creates an opportunity to consider lighting equipment as part of the wider workspace, not a separate afterthought. Practical lighting and organized equipment placement can support a cleaner and more manageable working environment for the whole crew. What Product Upgrades Are Appearing in HPS Grow Light Fixtures? Product upgrades don't always mean completely new lighting systems from scratch. Many changes involve small improvements to the fixture structure and the way individual components work together inside the housing. Housing design is one area where upgrades can get made without a full redesign. Manufacturers may revise the shape to improve installation, cleaning, airflow, or component access for the crew servicing it. Mounting systems can also evolve over successive product generations. Easier attachment and adjustment can help installers work more efficiently during new construction or facility renovation projects. Another area is serviceability of the fixture itself. A fixture that allows easier access to replaceable components can reduce disruption when maintenance is required mid-season. Cable management is receiving more attention as well across newer designs. Organized wiring can improve installation quality and make later inspection a lot easier for whoever's checking it. Protective design is another consideration worth noting. Growing spaces can expose lighting equipment to moisture, dust, and plant residue, so product development may focus on better integration between protection and ventilation working together. Surface treatment can also get adjusted based on feedback from the field. The goal may be easier cleaning or a more suitable appearance for commercial environments buyers are working in. Manufacturers are also considering how fixture components can get standardized across related products in their lineup. This can help commercial buyers manage replacement parts and maintain consistency across a facility with many units installed. These upgrades show that product development doesn't need to depend on a dramatic change in the light source itself. Practical improvements to the fixture can also affect the user experience quite a bit over time. How Are Commercial Buyers Evaluating HPS Grow Light Fixtures? Commercial buyers are often responsible for a lot more than selecting a light fixture off a catalog page. They need to consider installation, maintenance, facility layout, purchasing consistency, and future replacement all at once. A growing operation may purchase many fixtures at once for a single build-out. In such cases, differences in housing shape or mounting design can influence how easily the products get installed throughout the facility by the crew. Procurement teams may also compare material choices and surface treatments across different suppliers. The decision can depend on the conditions of the growing space and the cleaning process used by the facility day to day. Maintenance is another major consideration worth weighing carefully. If service work requires extensive disassembly or difficult access, the product may be a lot less convenient for a busy operation running on a tight schedule. Buyers can use a practical checklist when reviewing an HPS Grow Light Fixture before placing an order. Does the fixture suit the growing environment? Is the mounting method compatible with the facility? Can the housing be cleaned as part of routine maintenance? Does the structure provide a sensible approach to heat management? Is the reflector suited to the intended growing layout? Can service workers access important components? Does the product fit with other equipment in the same space? Can replacement components be managed conveniently? The purchasing process is also becoming more application driven across the industry. Instead of asking only how much light a fixture produces on a spec sheet, buyers can ask how the complete product will behave inside the facility over its working life. This approach can create a genuinely more balanced evaluation of the product. It brings installation, maintenance, structure, and application requirements into the same discussion at the purchasing table. For manufacturers, that means fixture development is becoming closely connected with the daily realities growers face on the floor. A product may enter a catalog as a lighting fixture, but its real value gets shaped by how naturally it fits into the working environment it's installed in.
What Makes Sodium Grow Light Suitable for Plant Stage
Aug 28.2026
Plant growth changes as the plant moves from one stage to another. Seedlings need a controlled environment as they develop new leaves and roots, while a young plant that looked healthy before may become stretched or pale when its growing conditions change. Mature plants tend to need a different balance once their structure fills out and the stems thicken. Flowering plants bring a whole other set of considerations into play, especially when natural daylight through a window just isn't enough to carry them through. Light is one part of this changing environment, though it is not the only factor growers need to consider. For indoor growing, choosing a suitable lighting system can shape how the space is arranged and managed from day to day. A Sodium Grow Light keeps coming up in these conversations because of its warm light appearance and its long track record in indoor cultivation. The term Grow Lights Sodium usually refers to lighting products built on sodium lighting technology, including systems designed specifically for horticultural use. These lights often get paired with other growing equipment, depending on the crop, the growing method, and where the plants sit in their cycle. The real question isn't whether sodium lighting can light up a room full of plants. It's how growers actually use it, adjusting as plants move from early development through active growth and into flowering. Why Does Light Management Change During Plant Growth? A plant's appearance shifts noticeably as it grows, sometimes over the course of just a few weeks. A small seedling might have only a couple of leaves and take up almost no space on a growing tray. A mature plant, by contrast, can spread into a wider canopy with denser foliage, and it starts demanding more consistent environmental management just to keep up with itself. This means the lighting arrangement often needs to shift as the plants get bigger and start crowding their own space. Growth Stage Lighting Consideration Management Focus Seedling stage Gentle and consistent illumination Early plant development Vegetative stage Broader canopy coverage Leaf and structural growth Flowering stage Suitable light environment Flower and fruit development Late growth Consistent growing conditions Maintaining plant condition A sodium-based lighting system fits into each of these stages differently, and its role doesn't have to stay fixed the whole way through. Growers might move the fixture higher or lower, change the lighting schedule, or bring in another light source as the plants develop past where the original setup made sense. The growing environment itself matters just as much as the light source. A small indoor garden on a spare room shelf has different lighting needs than a commercial growing room with several planting areas spread across the floor. Plant height, canopy shape, nearby equipment, and room layout can all change how light should actually get arranged. That's part of why light management works as an ongoing habit of cultivation rather than a decision made once and forgotten. How Can a Sodium Grow Light Fit Into Seedling Cultivation? Seedlings are fragile and still working out their basic structure, so growers tend to watch them closely at this stage. Light needs to fold into the growing environment without adding stress a young plant can't handle yet. A Sodium Grow Light can fit into a carefully managed setup, especially when growers are working to keep indoor conditions steady as roots and new leaves develop. The important thing isn't simply having light present in the room. Where the fixture sits and how the light actually reaches the growing area changes how evenly young plants receive illumination, and uneven light shows up fast in seedlings. Seedling Concern Lighting Consideration Small plant size Avoid an arrangement that overwhelms the growing area Uneven growth Consider consistent coverage Limited natural light Provide additional illumination where needed Changing plant positions Keep the lighting layout practical Small growing space Match the fixture to the available area Seedlings also change quickly, sometimes doubling in size within days. A lighting arrangement that suited a freshly planted tray may stop working once leaves expand and stems reach upward past where the light was aimed. Because of that, growers can treat early lighting decisions as part of a flexible plan rather than a fixed setup. The goal is a workable environment that can grow along with the plants instead of holding them back. What Role Can Grow Lights Sodium Play During the Vegetative Stage? The vegetative stage is when many plants put out more leaves and build a bigger structure overall. As the canopy spreads outward, how light gets distributed across the growing area starts mattering more than it did before. A single point of illumination rarely covers every part of a growing area evenly once plants fill in, and taller plants can start blocking light from reaching the leaves underneath them. This is where Grow Lights Sodium systems often become part of a broader lighting arrangement rather than standing alone. Vegetative Growth Need Possible Lighting Approach Expanding canopy Consider broader coverage Increasing plant height Reassess fixture position Dense foliage Pay attention to light distribution Multiple plants Organize fixtures around the growing area Changing plant shape Adjust the lighting layout as needed Growers also pay attention to how the plants look next to one another. When some plants get noticeably less light than others, their growth starts looking uneven, with some stretching toward the light while others lag behind. A thoughtful arrangement helps spread the available light more usefully across the whole cultivation area instead of favoring whichever plant happens to sit closest to the fixture. The fixture itself never works in isolation from everything else in the room. Ventilation, plant spacing, growing containers, and other equipment all shape how a lighting system actually fits into the space. This is why growers often have to look at the whole growing environment before deciding exactly where sodium lighting belongs. Why Are High Sodium Grow Lights Considered for Flowering Plants? Flowering brings a visible turn in the growing cycle, one that's usually easy to spot even for someone just checking in on the plants occasionally. Plants that spent weeks building leaves and stems begin redirecting their energy toward flowers and, for suitable crops, eventually fruit. Lighting becomes part of the daily environmental routine during this stretch. High Sodium Grow Lights get considered for flowering-stage cultivation fairly often, largely because their warm visual character fits the lighting preferences many indoor growers already lean toward. Their use also tends to complement how growers organize a dedicated flowering area within a larger space. Flowering Area Lighting Planning Point Dense canopy Consider how light reaches different areas Tall plants Position fixtures with plant height in mind Multiple containers Keep coverage practical across the room Mixed plant sizes Account for differences in canopy height Dedicated flowering area Match the lighting setup to the cultivation plan Flowering plants often carry a more developed canopy than they did during the seedling stage, which changes the whole relationship between fixture and plant. A fixture positioned well for young plants may sit awkwardly once those same plants mature and reach upward. Growers can keep watching plant development and make reasonable adjustments instead of treating the original lighting position as something set in stone. The point is keeping the lighting arrangement aligned with how the growing area keeps changing shape underneath it. How Does a HPS Grow Light Fixture Fit Into an Indoor Growing System? A lighting product is only one piece of an indoor cultivation space, not the whole system by itself. The fixture has to work alongside ventilation, plant containers, support structures, electrical equipment, and whatever room layout the grower is stuck working with. An HPS Grow Light Fixture fits into a growing system wherever sodium-based lighting has been chosen as part of the cultivation plan. Its physical design matters quite a bit here, since installation directly affects how the light actually reaches the plants below it. Fixture Consideration Why It Matters Mounting arrangement Affects how the fixture fits into the growing area Fixture position Influences the area receiving illumination Surrounding equipment Can affect available installation space Plant height Changes the relationship between plants and light Maintenance access Makes routine inspection easier A workable fixture also needs to fit how growers actually move through their space day to day. If equipment sits somewhere hard to reach, routine cleaning or inspection turns into a chore people start putting off, and dusty fixtures lose effectiveness over time. The surrounding layout should leave reasonable room for handling and maintenance rather than squeezing the fixture into a corner nobody wants to deal with. Growers can also think ahead to how much the plants will grow before installing anything permanently. A setup that works fine when plants are small can turn awkward fast once the canopy fills out and starts crowding the fixture itself. Planning around that kind of growth ahead of time makes the whole lighting system easier to manage months down the line. Can Sodium Lighting Be Used Across Different Plant Growth Stages? Sodium lighting doesn't need to be tied to just one stage of plant development. How it gets applied can shift depending on the crop, the cultivation method, how much natural light is already available, and the overall lighting strategy a grower has settled on. Some growers run sodium lighting through the entire growing cycle without changing much. Others combine it with a second light source or rework the arrangement as the plants move from one stage into the next. Approach Possible Reason Use during early growth Supplement available natural or indoor light Use during vegetative growth Support a larger growing area Use during flowering Match the preferred lighting environment Combine with other lighting Create a more flexible cultivation setup Change placement over time Follow changes in plant height and canopy Flexibility tends to matter more than any single fixed formula here. Plants are living things, and their appearance can change quite a bit over the course of a growing cycle, sometimes faster than a grower expects. A lighting plan that stays frozen in place without accounting for that growth tends to become less useful as the space around it keeps changing. Regular observation helps growers figure out when an adjustment is actually worth making instead of guessing. That might mean shifting fixture placement, rearranging plants, or just stepping back and reviewing the whole lighting setup with fresh eyes. Decisions made that way usually hold up better than sticking to one lighting approach no matter what the plants are doing. What Factors Should Growers Consider When Choosing Sodium Lighting? Picking a lighting system involves more than just choosing a lamp type off a shelf. The physical growing area, how plants are arranged, the installation method, the maintenance routine, and the actual cultivation goals all feed into that decision. Growers can walk through a handful of practical questions before settling on a product. What Stage of Growth Will the Lighting Serve? A fixture meant for seedlings often gets used differently than one installed over a mature flowering canopy that's already filled out. How Is the Growing Area Arranged? The shape of the room and where the plants sit within it can change how fixtures should be spread out. Will Plant Height Change Significantly? If plants are going to grow taller during cultivation, the original fixture position may need a second look partway through. How Will the Fixture Be Installed? The mounting method should fit whatever structure is available and still leave practical access for routine handling. Will Other Lighting Be Used? Some growing spaces run more than one type of light together to build a more flexible environment. How Easy Is Routine Maintenance? The fixture should fit into the normal cleaning, inspection, and replacement routine of the space rather than fighting against it. Questions like these help narrow down workable options without leaning on a single product feature as the deciding factor. They also push growers to think about lighting as part of the whole cultivation environment instead of a standalone purchase. How Does Plant Layout Affect Sodium Light Use? Plant arrangement can have a surprisingly strong pull on how a lighting system actually performs in practice. A growing room with evenly spaced containers creates a different lighting situation than one filled with plants of mixed heights and shapes crowding each other. Dense foliage also changes how light travels down through the different layers of a canopy. Growers can review the plant layout whenever the canopy changes in a noticeable way, rather than waiting for problems to show up in the leaves. Plant Layout Lighting Management Consideration Evenly spaced plants Maintain consistent coverage Tall plants Consider height differences Dense canopy Review light distribution Mixed plant sizes Avoid focusing lighting only on taller plants Moving containers Keep fixture placement practical The relationship between plants and fixtures matters even more once flowering starts. Flowers can develop at different points across a plant, while leaves stack into layers that shade one another as the canopy thickens. A well-thought-out lighting arrangement takes those shifts into account rather than ignoring them. That doesn't mean every leaf and flower needs identical light at every single moment. Instead, the aim is a lighting environment that actually fits how the plants occupy the space they've been given, uneven as that space might be. How Can Growers Manage Sodium Lighting More Efficiently? Good lighting management is closely tied to careful observation, especially when setting up an indoor growing space. Plants often show visible signs when their surroundings change, such as leaves leaning toward one side or growth slowing across part of the canopy. Changes in leaf position, overall growth pattern, or canopy development can all be a nudge to review the current lighting arrangement. A simple management routine might include: Checking the position of growing plants. Looking for areas that appear poorly illuminated. Keeping fixtures and surrounding equipment clean. Reviewing fixture placement as plants become taller. Keeping the growing area organized. Coordinating lighting with other environmental equipment. None of these tasks demand a complicated routine or special training. They mostly come down to noticing how the plants and the equipment are actually interacting week to week. For growers using High Sodium Grow Lights, regular observation helps settle whether the current arrangement still suits the crop and the space it's growing in. A HPS Grow Light Fixture also tends to be easier to manage when its installation spot has been planned around access, plant movement, and whatever other equipment shares the room. This kind of approach lets the lighting system stay part of an adaptable growing environment instead of turning into a fixed fixture nobody revisits after installation day. The same idea applies when using Grow Lights Sodium across different stages of a crop's life. As seedlings grow into larger plants and mature plants move into flowering, their relationship with lighting changes along the way. The growing area should be treated as a space that develops throughout cultivation, with fixture placement, plant position, and daily care adjusted to suit what the plants need at each stage.
DIY Assembly of an Outdoor Resin Shed
Aug 26.2026
Building a resin shed is one of the satisfying DIY jobs you can do in a weekend. Unlike timber or metal buildings, resin sheds are designed to be assembled by hand, with no specialist tools, no cutting and no painting. Follow this step-by-step guide and you can expect a sturdy, level, weatherproof building — with doors that open smoothly and a structure that stays square for years. Before you start Tools and helpers Rubber mallet, Phillips screwdriver (or the tool supplied with your shed), work gloves, and a step ladder. Some models are fully tool-free — the panels simply clip together. Check your manual. Two people make the job noticeably easier. Wall and roof panels are large and light, and a second pair of hands keeps them aligned while you fix them in place. Delivery check When the shed arrives, check the packaging for visible damage before signing for it. Open the boxes and confirm every panel and fitting against the parts list in the manual before you begin. Reporting a missing part is far easier before you start building than halfway through. Site conditions Choose a level, well-drained spot. Paving slabs, a concrete base or compacted gravel all work well. Allow a little clearance around the shed so you can reach every side during assembly. Avoid building directly on soil or grass — a resin shed needs a firm, level base to stay square and to anchor securely. Step 1: Prepare a level baseThe base determines how good the finished shed is. If the base is uneven, wall panels can sit out of square and doors may bind. Level the base with a spirit level before you lay anything on it, and make sure it is slightly larger than the shed footprint so no panel overhangs the edge. Step 2: Lay out the partsSort the panels by their labels or numbers and keep the hardware tray organised. Read the manual once through before touching a single panel — resin sheds are designed to be built in a specific order, and following it saves you from taking panels apart again. Step 3: Assemble the floor frame and floor (models with a floor kit) If your shed includes a floor: Connect the floor joists on the base and fit the floor panels into the frame. Check the frame is square by measuring the diagonals — they should be equal. A square start makes every later step easier. Step 4: Build the wall panels Start with a corner panel or the back panel, as your manual specifies. Connect each panel to the previous one using the channels, grooves or screws described in the manual. Panels should seat with a firm click; a light tap with the rubber mallet helps them settle. Work around the building panel by panel. If the build uses screws, keep them finger-tight until all walls are in place, then tighten everything — this lets the structure settle into square. Step 5: Install the door frame and doors Fit the door frame, then hang the doors. Test the doors before you fully tighten the fixings. They should open and close without catching; small adjustments at this stage are normal and quick. Fit the door handle and lock, and test the lock with the door closed. Step 6: Fit the roof Lay the roof panels according to the manual — they are designed to overlap in a specific direction so rain runs off correctly. Fit the ridge piece along the peak, then the roof trim or caps. Check that all roof edges seat fully into the wall panels before moving on. Step 7: Secure the shed to the base Anchor the shed using the fixing points and ground anchors described in the manual. Correct anchoring is what gives a resin shed its wind resistance, especially for larger models. Follow the manual for any final seals or covers for the fixing points. Step 8: Final checks Open and close both doors several times — they should move smoothly and the lock should engage cleanly. Walk around the shed and check every panel joint is seated and every fixing is in place. Sweep out any packaging debris, then hose down the outside if needed. Your shed is ready to use. Common mistakes to avoid Skipping the manual. The panel order exists for a reason — force-fitting panels in the wrong sequence is the common source of problems. Forcing panels. Resin panels are designed to click together. If a panel resists, check the alignment rather than forcing it — a light tap with a rubber mallet is all that should be needed. Building on an uneven base. The shed will follow the ground: an uneven base means twisted panels and doors that bind. Over-tightening screws. Screws that are tightened fully before the structure is square can stress panels and distort the frame. Finger-tight first, then final tighten. Skipping the anchoring. A well-anchored shed resists wind; an unanchored one does not. How long does it take? Most standard resin sheds take a few hours to assemble with two people. Building alone, allow a full day and take your time — there is no prize for speed, and careful alignment at every step produces a better result than rushing. After assembly A resin shed needs no painting, no staining and no annual treatment. Routine care is simple: rinse the panels with a garden hose, clear any leaves from the roof, and check the ground anchors once or twice a year, especially after a storm. Doors may need a drop of lubricant on the hinges from time to time. A note on instructions — why they matter The quality of assembly starts with the quality of the instructions. A good manufacturer supplies a clear, illustrated manual with numbered parts and a step-by-step video to follow along. If you are buying from a manufacturer that offers both, you are purchasing a cabin that is designed to be easily built by someone with no prior experience.
How Does HPS Grow Light Fixture Fit Greenhouse Needs
Aug 21.2026
A grower walking through a greenhouse at dusk, watching workers duck under fixture mounts to reach the irrigation valves, understands exactly why lighting design can't get treated as an afterthought bolted onto the ceiling. Greenhouse lighting isn't simply a matter of adding lamps above plants. The arrangement, fixture design, mounting position, growing area, and daily production routine all affect how artificial light actually fits into a working greenhouse. An HPS Grow Light Fixture is one type of lighting equipment used in controlled growing environments. Its design can influence how light gets positioned across plant areas and how easily the lighting system fits into an existing greenhouse layout, rather than fighting against it. The term HPS refers to high-pressure sodium lighting. This technology has been used in agricultural lighting applications because its warm light output can fit certain plant-growing environments well. A Sodium Grow Light can be considered where growers need supplemental lighting during periods when natural daylight doesn't fully support the intended growing routine. High Sodium Grow Lights may also get selected for larger growing areas where fixture placement and coverage need careful planning across a bigger footprint. The choice isn't only about the lamp itself. Greenhouse structure, crop arrangement, installation access, plant height, and working conditions all influence how the fixture should actually get used. Why Greenhouse Layout Matters for HPS Grow Light Fixture Design A greenhouse is a genuinely active working environment, not a static display space. Plants need room to grow. Workers need space to move through without ducking and weaving. Irrigation equipment, ventilation systems, support structures, and other equipment may also occupy the same overhead area competing for the same real estate. An HPS Grow Light Fixture needs to fit within this environment without making routine work unnecessarily difficult for the people actually running the place. The layout can influence several practical decisions. Greenhouse Area Lighting Consideration Growing beds Light should be positioned around the plant area Walkways Fixtures should not interfere with movement Tall crops Mounting position may need adjustment Propagation areas Lighting arrangement can differ from mature crops Service areas Access should remain practical A fixture placed without considering the greenhouse layout may create shadows or make maintenance genuinely harder down the line. The position of the plants matters just as much. A greenhouse with evenly arranged growing beds presents different lighting challenges from one with multiple crop zones running side by side. This is why lighting planning often starts with the physical layout, rather than choosing fixtures from a catalog right away. How an HPS Grow Light Fixture Fits Different Plant Lighting Needs Plants don't all grow in the same way, obviously, but it's easy to underestimate how much that affects lighting design. Some crops get grown close to the ground. Others develop taller canopies reaching toward the roof. Some are arranged in rows, while others occupy benches or containers spread across the floor. The lighting system needs to accommodate these differences rather than applying one blanket approach. A Sodium Grow Light can provide supplemental artificial light when natural conditions aren't sufficient for the growing schedule at hand. The fixture's position can then get adjusted according to the crop arrangement in that specific zone. For example, a low-growing crop may allow a more straightforward overhead arrangement without much fuss. Taller plants can change the relationship between the lamp and the upper plant area considerably. Plant spacing also matters quite a bit here. When plants are packed closely together, leaves can shade nearby plants from each other. The lighting arrangement may need to account for these natural differences within the canopy itself. Crop Arrangement Possible Lighting Focus Low-growing plants Even overhead placement Tall plants Consideration of canopy height Row planting Alignment with growing rows Bench growing Fixture placement around bench layout Mixed crops Separate lighting zones The purpose isn't treating every greenhouse the same way, since they rarely are. A practical lighting system should fit the crops actually being grown in that specific space, not a generic assumption. What Role Sodium Grow Light Placement Plays in Greenhouse Lighting Placement affects how artificial light actually reaches the growing area below it. An overhead fixture may illuminate a broad area, while its position relative to plants can change the distribution of light across the crop considerably. This makes mounting location a genuinely important part of greenhouse planning, not an afterthought. The fixture should be positioned with nearby structures in mind. Roof supports, irrigation lines, ventilation equipment, and hanging accessories can all influence the installation process in ways that may not be obvious at a glance. A suitable arrangement should also let workers move through the greenhouse without constantly working around lighting equipment hanging in the way. The height and position of the fixture can get considered together with plant development over time. Young plants and mature plants may occupy genuinely different amounts of vertical space. A lighting arrangement that works for one stage may need adjustment as the crop develops toward harvest. For growers, flexibility can therefore prove genuinely useful. A fixture that can be installed and serviced without major disruption can fit a lot more naturally into a changing agricultural environment throughout a growing cycle. How High Sodium Grow Lights Fit Larger Greenhouse Areas Larger greenhouses often contain multiple growing zones running at once, each with their own needs. A single lighting arrangement may not suit every part of the facility equally. Different zones can have different crops, plant heights, working schedules, or natural light conditions depending on orientation and structure. High Sodium Grow Lights can get arranged as part of a broader lighting plan where supplemental illumination is needed most. The fixtures can get considered in groups, rather than one at a time in isolation. For example, a greenhouse may divide its lighting into main growing areas, propagation areas, areas with lower natural light, areas with different crop layouts, and spaces used for specific growing routines. This approach can make the lighting system a lot easier to manage overall. It also allows growers to think about which areas actually need supplemental lighting, rather than treating the entire greenhouse as one uniform space needing identical treatment. The fixture design should support this zoned approach. Mounting options, access for servicing, and the relationship between neighboring fixtures can all affect how a larger installation actually functions once it's running. How HPS Fixtures Can Work With Natural Greenhouse Light Greenhouses already make use of sunlight, obviously, and that's part of the appeal of the structure itself. Artificial lighting is therefore often considered as part of a combined lighting environment, rather than a complete replacement for natural light streaming through the roof. The amount of daylight entering a greenhouse can change with weather, season, roof structure, plant growth, and surrounding conditions throughout the year. An HPS Grow Light Fixture can get incorporated into a system where artificial lighting supports the growing environment as natural light shifts through the seasons. This requires attention to the greenhouse's existing design from the start. A fixture shouldn't be placed without considering how sunlight enters the space. Natural shadows created by the greenhouse structure can also change the light reaching the plant area below. The goal is creating a practical relationship between natural and artificial light working together, rather than one fighting the other. For growers, this can mean using lighting in selected areas or during particular periods, rather than running every fixture continuously regardless of conditions. Such an arrangement may also make it easier to manage different crop zones with different light needs. What Design Features Make Greenhouse Installation Easier Installation can get genuinely challenging in a greenhouse, because the ceiling area is already crowded with structural and agricultural equipment competing for space. An HPS Grow Light Fixture should therefore get considered from an installation perspective right from the design stage. Several features can affect practical use once it's in place. Mounting arrangement. The fixture should have a suitable way to connect with the greenhouse structure without fighting existing supports. Service access. Workers need a practical method for reaching the fixture when inspection or replacement is required, not a ladder gymnastics routine. Cable organization. Electrical connections should be arranged neatly and kept compatible with the greenhouse environment, including humidity and dust. Fixture positioning. The lighting unit should remain clear of nearby equipment and crop growth as plants develop. Structural compatibility. The mounting method should suit the existing greenhouse framework rather than requiring major modification. These details may appear small during planning, but they become genuinely important once many fixtures are installed across a large area. A lighting system that's easy to access can reduce disruption to normal greenhouse work considerably. How Fixture Design Affects Greenhouse Working Conditions A greenhouse is not only a plant-growing space. It's also a workplace where people spend their days. Workers may need to water plants, inspect leaves, move containers, harvest crops, clean surfaces, and repair equipment, often all in the same afternoon. Lighting fixtures shouldn't make these tasks harder than they need to be. An HPS Grow Light Fixture can influence the space beneath it through its position, housing design, mounting arrangement, and accessibility. A well-planned layout leaves clear routes for workers moving through the space. This matters particularly in areas with tall crops. As plants grow, the available working space can become noticeably narrower over the season. The lighting arrangement should get planned with expected plant growth in mind from the outset, not adjusted reactively later. A fixture positioned too close to equipment or a busy work area may create unnecessary obstacles that workers just learn to live with. The same principle applies to maintenance down the line. If workers need to move large equipment around the greenhouse, lighting installations shouldn't block common routes they rely on. Thinking about maintenance during the initial design stage can make later work a lot more manageable when the time comes. Can Sodium Grow Lights Be Used in Different Agricultural Applications? Agricultural lighting needs vary considerably according to the type of production happening. Greenhouses may get used for vegetables, herbs, flowers, seedlings, and other crops, each with their own layout and production routine. A Sodium Grow Light can get integrated into different environments when its characteristics fit the intended application at hand. The decision may involve more than the crop itself. Growers can consider: Plant height Growing arrangement Greenhouse structure Natural daylight conditions Working access Lighting zones Fixture maintenance Installation location A propagation area may require a genuinely different lighting arrangement from a mature crop area down the row. Similarly, a greenhouse used for rows of tall plants may need a different fixture position from one using low benches spread across the floor. This makes the design of the overall lighting system just as important as the choice of lighting technology itself. How Growers Should Think About Lighting Zones Lighting zones can help divide a greenhouse according to actual needs, rather than treating the whole space as one block. Not every part of a growing facility necessarily has the same conditions. One area may receive more natural light through a south-facing section. Another may be shaded by greenhouse structures or neighboring crops blocking the sun. A zone-based arrangement can allow lighting decisions to reflect these real differences. Zone Possible Lighting Planning High natural light area Supplemental lighting when needed Shaded growing area Additional attention to fixture placement Young plant area Arrangement based on plant size Mature crop area Consideration of canopy development Service area Keep fixtures and cables clear This approach can also make future adjustments a lot easier down the line. If the crop arrangement changes, the lighting plan can get reviewed by zone, instead of redesigning the entire greenhouse from scratch. For a facility handling several crop types, this can prove particularly useful when priorities shift season to season. The fixture becomes part of a larger system of growing areas, rather than an isolated piece of equipment hanging on its own. What Buyers Should Consider When Selecting an HPS Grow Light Fixture Buyers can begin by looking at the greenhouse itself, rather than focusing only on the fixture spec sheet. The physical environment determines how practical a lighting product will actually be once it's installed. Useful questions include: Where will the fixture be mounted? How will workers access it? What type of plants will be grown below it? How will plant height change during cultivation? Are there irrigation lines or structural supports nearby? Can the lighting area be divided into useful zones? How will the fixture fit with existing greenhouse equipment? Can routine inspection be carried out without major disruption? The answers to these questions can help narrow the available options considerably. The same applies when comparing High Sodium Grow Lights with other agricultural lighting approaches on the market. The right choice depends on the intended use and the environment in which the equipment will actually operate day after day. How Fixture Design Can Support Long-Term Greenhouse Use Greenhouse equipment remains part of the facility well after installation day. Plants change through the seasons. Growing layouts change as crops rotate. Equipment gets moved around. Maintenance tasks happen regularly. New crop areas may get added as operations expand. A practical lighting design should allow room for these changes rather than locking things in place permanently. The HPS Grow Light Fixture should fit the greenhouse structure without making future adjustments unnecessarily difficult when priorities shift. Access is particularly important here. A fixture that can be inspected without disturbing nearby systems can be a lot easier to manage over time as the greenhouse evolves. The surrounding installation should also stay organized rather than becoming a tangle nobody wants to touch. Cables, mounting points, and nearby equipment should have clear relationships to each other. This can make it a lot easier for workers to understand the system when maintenance is actually required. A thoughtful design also considers how the greenhouse will get used during different stages of plant growth, not just at installation. The fixture should support the growing environment while leaving enough room for people to perform their daily tasks without fighting the equipment overhead. In this way, Sodium Grow Light, grow lights sodium, and High Sodium Grow Lights can get considered not only as lighting products but as parts of a broader greenhouse arrangement. Their practical value depends on how the fixture design, crop layout, installation position, natural light, working space, and agricultural application fit together in the specific facility they're serving.
How Can a Walk in Small Greenhouse Maximize Growing Space
Aug 14.2026
Someone standing in their courtyard with a tape measure, trying to figure out if a greenhouse will actually fit without swallowing the whole yard, is usually asking the wrong question. The real question isn't how much floor space a Walk in Small Greenhouse takes up — it's how much of that space actually gets put to work.A well-planned structure makes practical use of vertical space, organized plant arrangements, clear pathways, and a layout that uses limited ground area efficiently instead of leaving valuable space above waist height unused. This is especially useful for small courtyards, compact gardens, and growing areas where available space needs to be used thoughtfully. A small greenhouse does not have to limit the scope of a growing plan. Plants can be arranged across different levels, while walls and upper spaces provide room for crops that do not need to grow directly from the ground. Shelves, hanging containers, narrow planting beds, and movable growing units all add usable space without adding a single extra square foot of footprint. The structure itself shapes how efficiently that interior actually gets used too. Door placement, roof shape, frame arrangement, and how wide the walking areas are can all influence where plants end up going. A thoughtful layout makes a compact greenhouse feel organized instead of cramped, without making it a hassle to actually work inside once the plants start growing in. Why Space Planning Matters in a Small Greenhouse Space planning lets a Walk in Small Greenhouse use its available area for both plants and human movement without leaving awkward gaps nobody can use for anything. A poorly arranged greenhouse can technically have enough floor space on paper and still feel crowded in practice, because plants, containers, tools, and pathways all end up competing for the exact same square footage. The trick is thinking past the floor entirely. Plants naturally occupy different heights depending on how they grow. Low crops like lettuce or herbs stay close to the ground, while taller plants like tomatoes can climb vertical supports instead of sprawling outward. Shelves hold smaller containers above planting beds, effectively creating separate growing layers within the same footprint that would otherwise support just one layer of plants. Access needs to stay practical throughout all of this. A greenhouse packed wall-to-wall with plants might look impressively productive in a photo, but if the gardener can't actually reach the back row without knocking something over, daily care turns into a chore nobody wants to do. Watering, pruning, harvesting, checking for pests — all of it needs enough room to actually move through comfortably. A useful layout ends up balancing three things at once: growing space, storage space, and room to move. When someone plans these together instead of separately, a compact greenhouse supports a lot more plants without turning into something genuinely difficult to manage day to day. How Vertical Space Increases Growing Capacity Vertical growing increases usable space inside a Walk in Small Greenhouse by letting plants and containers occupy the air above the ground instead of competing for the same patch of dirt. This matters especially when a courtyard or garden simply doesn't have room to expand outward any further. Shelving is probably the simplest way to claim that vertical space. Smaller plants, seed trays, herbs, and containers sit on shelves while larger plants stay below on the actual floor. This creates several distinct growing zones without needing an inch more ground area than what's already there. Hanging containers offer another option worth using. Plants that naturally trail downward, or stay relatively compact overall, can hang above the main growing area — strawberries, trailing herbs, even some flowering plants work well here. That turns otherwise unused overhead space into a genuine extra layer of the garden. Vertical supports help climbing plants grow upward instead of sprawling across the floor and eating up walking room. Cucumbers or beans trained up a trellis leave the lower area a lot more open, letting that same ground zone support a different type of plant entirely at the same time. The whole arrangement still needs to leave room for actual care, though. Shelves and hanging plants shouldn't block the entrance, cut off access to plants below them, or make routine watering an awkward reach-around every single time. Vertical space earns its keep when it improves the overall layout, not just when it lets someone cram in a few more pots for the sake of it. How a Small Courtyard Works With a Walk in Small Greenhouse A small courtyard works well with a Walk in Small Greenhouse when the structure gets positioned to make genuinely efficient use of the outdoor area around it. Rather than treating the greenhouse as some standalone building plopped down wherever there happened to be room, homeowners do better thinking of it as one piece of the wider garden layout. Where the greenhouse sits shapes how easily people actually move around it. Placing it near a wall saves open courtyard space for other uses, while positioning it close to a garden entrance makes daily trips in and out a lot more convenient than trekking across the whole yard. Sunlight deserves real thought too. Nearby walls, trees, fences, and neighboring buildings all affect how much natural light actually reaches the greenhouse through the day. That location decision needs consideration before installation, not after the structure's already anchored into the ground and nobody wants to move it again. The surrounding courtyard can also handle tasks that don't need to happen inside the greenhouse at all. Larger tools, compost bins, or outdoor planting beds can stay outside, letting the greenhouse interior stay focused purely on plants and the working space they actually need. This approach tends to make a compact garden feel a lot more organized overall. The greenhouse becomes the central growing hub, while the courtyard around it handles everything else that would otherwise eat into valuable interior space. How Plants Should Be Arranged Inside a Small Greenhouse Plant arrangement helps a Walk in Small Greenhouse use limited space efficiently by grouping plants according to height, growth habit, and how much care each one needs. Instead of just plunking containers down wherever there's an open spot, growers can set up clear zones for different plant types from the start. Tall plants belong in spots where they won't shade out or crowd shorter plants nearby. Lower-growing plants can take the front sections or open floor areas, where they get more light and stay easier to reach for daily checking. Grouping plants by similar watering needs makes daily care a lot more straightforward too, since the gardener isn't constantly bouncing between opposite ends of the greenhouse just to water one thirsty plant and one that barely needs it. The growing cycle matters here as well. Some plants need a lot more room once they mature than they did as seedlings, while others stay fairly compact their whole life. Leaving room for that growth upfront keeps the greenhouse from turning into an overcrowded mess three months down the line. Plant Arrangement Space Planning Idea Tall plants Place where they won't block smaller plants nearby Low-growing plants Use lower shelves or open floor areas Climbing plants Train onto vertical supports Container plants Group together by shared care needs Hanging plants Use suitable overhead areas Seedlings Place on shelves that stay easy to reach A well-arranged greenhouse isn't simply one filled with plants. It's a space where plants have room to grow while people can still reach, inspect, and care for them without difficulty. How Passageways Improve the Use of Growing Space Well-planned passageways let a Walk in Small Greenhouse use more of its growing space without making everyday maintenance a headache. A narrow or badly positioned path makes the whole interior feel cramped and often forces the gardener to step around plants and containers just to get from one side to the other. The main passage should connect the important spots — entrance, planting beds, shelves, watering points — directly. Smaller side paths work fine where they're actually needed, but they shouldn't chop the growing area into so many disconnected little sections that nothing feels like one coherent space. Where the door is positioned can shape the entire layout, often in ways people don't expect. If the entrance opens straight into a planting bed, that's usable growing space lost right at the doorway. A better setup guides movement toward a central path instead, keeping plants arranged along the sides where they're out of the way but still easy to reach. Movable containers add real flexibility here too. When a plant needs more room to spread out, the arrangement can shift without tearing apart and rebuilding the whole interior layout from scratch. The passageway also needs to genuinely support maintenance work. Someone should be able to reach a plant without brushing against leaves or knocking over neighboring containers. Harvesting a tomato shouldn't mean disturbing three other plants in the process. In a compact greenhouse, a path isn't wasted space at all — it's part of the growing system itself, since it's what actually gives the gardener access to everything that's been carefully arranged around it. How Greenhouse Structure Affects Interior Space A greenhouse's structure affects how much of its interior actually becomes usable growing space, since the frame, walls, roof, doors, and supports all determine where plants and equipment can realistically go. A structure with clear, open interior areas makes it a lot easier to add shelves, planting beds, and vertical growing setups without fighting the building itself. A greenhouse with a steel frame is worth considering when structural support and long-term durability matter for a project. The frame sets the basic shape of the whole greenhouse and shapes where growing systems and accessories can actually attach or sit. Roof design matters here too. A taller interior opens up more opportunities for vertical planting, while the roof's shape affects how easily hanging containers or climbing supports can actually get installed without fighting the ceiling line. Doors and ventilation openings need real thought as well. Where they sit shapes where plants can go and how people actually move through the space day to day. The greenhouse structure needs to be considered alongside the interior plan rather than afterward. Choosing the structure on its own and then trying to fit the plant layout around it can create unnecessary restrictions that could have been avoided. A better approach starts with the growing plan before locking in the final structure. That makes it a lot easier to figure out exactly how much space plants, paths, storage, and routine maintenance actually need before pouring a single footing. Can Shelves and Containers Make Small Greenhouses More Flexible? Shelves and containers make a Walk in Small Greenhouse more flexible by letting growers change the arrangement as plant needs shift through the season. Fixed planting beds work fine for some setups, but they can limit how much the interior can adapt later on once plants start behaving differently than expected. Shelves hold smaller plants while leaving the floor open for larger crops that actually need it. Different shelf heights create separate growing zones and make it a lot easier to group plants by size without them competing for the same light and space. Containers bring their own advantage simply because they can move. A plant that's not getting enough sun can shift toward a brighter spot, while a plant that's finished producing can get relocated to make room for something new coming in behind it. This flexibility really pays off in small spaces specifically. Instead of treating the greenhouse layout as something fixed and permanent, growers can adjust it as the current growing cycle actually demands, season after season. That said, movable containers shouldn't be allowed to drift into the main passage and turn into clutter. Giving them designated spots keeps that flexibility useful instead of letting it become a tripping hazard. Storage fits into this arrangement too. Small tools, planting materials, and spare containers belong on dedicated shelves rather than eating into floor space that plants could actually be using. What Buyers Should Consider When Planning a Small Greenhouse Buyers should think through their available courtyard space, intended plants, access requirements, structure, and future growing plans before settling on a small greenhouse. These factors determine whether the interior can genuinely support the growing arrangement someone actually has in mind. The available outdoor area needs real measuring and observing throughout the day, not just a quick glance in the morning. Light conditions shift depending on nearby buildings, walls, fences, and trees, and a spot that looks sunny at 10am might sit in shadow by 3pm. The intended plants should shape the structure choice too. A garden built around climbing plants needs more vertical support built in, while a collection of small potted herbs and seedlings benefits more from generous shelving instead. Buyers should also think honestly about how the greenhouse will actually get used. A structure for personal, relaxed gardening carries different requirements than one meant for regular, serious production. For businesses buying multiple structures at once, Commercial Greenhouse Wholesale options offer a practical way to plan larger growing projects around one consistent structure design. That purchasing decision still needs to account for the actual site, crop arrangement, installation needs, and intended use, rather than just focusing on how many units show up in the order. Frame material deserves consideration too. A greenhouse with a steel frame can provide the kind of structured, durable interior that suits projects expecting repeated use and genuinely organized growing areas over the years, not just one season. How Commercial Greenhouse Wholesale Supports Space Planning Commercial Greenhouse Wholesale purchasing supports larger growing projects by giving buyers access to structures that can be planned around one consistent layout across multiple units. This works well for growers who need several greenhouses at once, or who are developing multiple growing areas across a larger property. A wholesale approach also makes it easier to think about the whole garden as one connected system, rather than a scattered collection of individual structures with no relationship to each other. Paths between greenhouses, shared storage areas, water access points, and planting zones can all get planned together from the start. The interior layout still needs to stay flexible enough to handle different plant arrangements as needs change. Shelves, containers, vertical supports, and working paths all get incorporated according to whatever the specific growing project actually calls for. Small courtyards benefit from this same planning logic on a smaller scale too. Even when there's only room for a single Walk in Small Greenhouse, the space around it can still get organized to genuinely support the structure rather than sitting there unused. The real goal here isn't just cramming more plants into a limited area for the sake of it. Effective space planning builds a working relationship between the structure, the plants, the paths, and the daily tasks someone actually needs to do. When those pieces fit together well, a compact greenhouse becomes a genuinely practical growing environment without demanding a sprawling outdoor footprint to pull off.

Industry Knowledge

What is Grow Tent Kit Accessories?

Grow tent kit accessories are a collection of equipment and supplies specifically designed to support indoor plant growth within a grow tent setup. These may include items such as lights, fans, ventilation systems, reflectors, ducting, timers, thermometers, hygrometers, nutrient solutions, and plant training tools. These accessories help to create an optimal growing environment for plants, including providing proper light, air flow, temperature and humidity control, and essential nutrients.

The composition of the Grow Tent Kit Accessories

The composition of a grow tent kit accessories can vary depending on the brand, size, and type of grow tent setup, but typically it may include:
1. Grow lights: High-intensity discharge (HID) lights, LED lights, fluorescent lights, etc.
2. Ventilation systems: Inline fans, carbon filters, ducting, duct fans, etc.
3. Environmental control: Thermometers, hygrometers, temperature controllers, humidifiers, dehumidifiers, etc.
4. Reflectors: Air-cooled reflectors, wing reflectors, etc.
5. Growing mediums: Soil, hydroponic systems, grow trays, etc.
6. Irrigation equipment: Water pumps, timers, nutrient delivery systems, etc.
7. Plant training tools: Trellis nets, pruning shears, plant ties, etc.
8. Pest control: Neem oil, insecticidal soap, sticky traps, etc.
9. Additional accessories: Grow tent sheets, ropes, light hangers, and other miscellaneous items.
Having a good mix of these accessories will help ensure a successful indoor grow operation.

The role of the Grow Tent Kit Accessories

Grow tent kit accessories are products designed to enhance the performance and efficiency of a grow tent setup for indoor gardening. They serve various purposes, such as controlling the environment inside the tent, maintaining temperature and humidity levels, providing proper lighting and ventilation, and protecting the plants from pests. Some common grow tent accessories include fans, carbon filters, thermometers, hygrometers, ducting, light hangers, and plant trays. These accessories help optimize growing conditions and promote healthy plant growth, leading to better yields and improved quality of the crops.